

For our second dive into the glittery world of 3.3 we are going to take a look at the shiny new maps tab and some behind the scenes settings. Last week we looked at attaching cameras to videos, now we’ll learn how to view those cameras in the maps tab and about some of the other fun stuff you can do there.
 Map display options
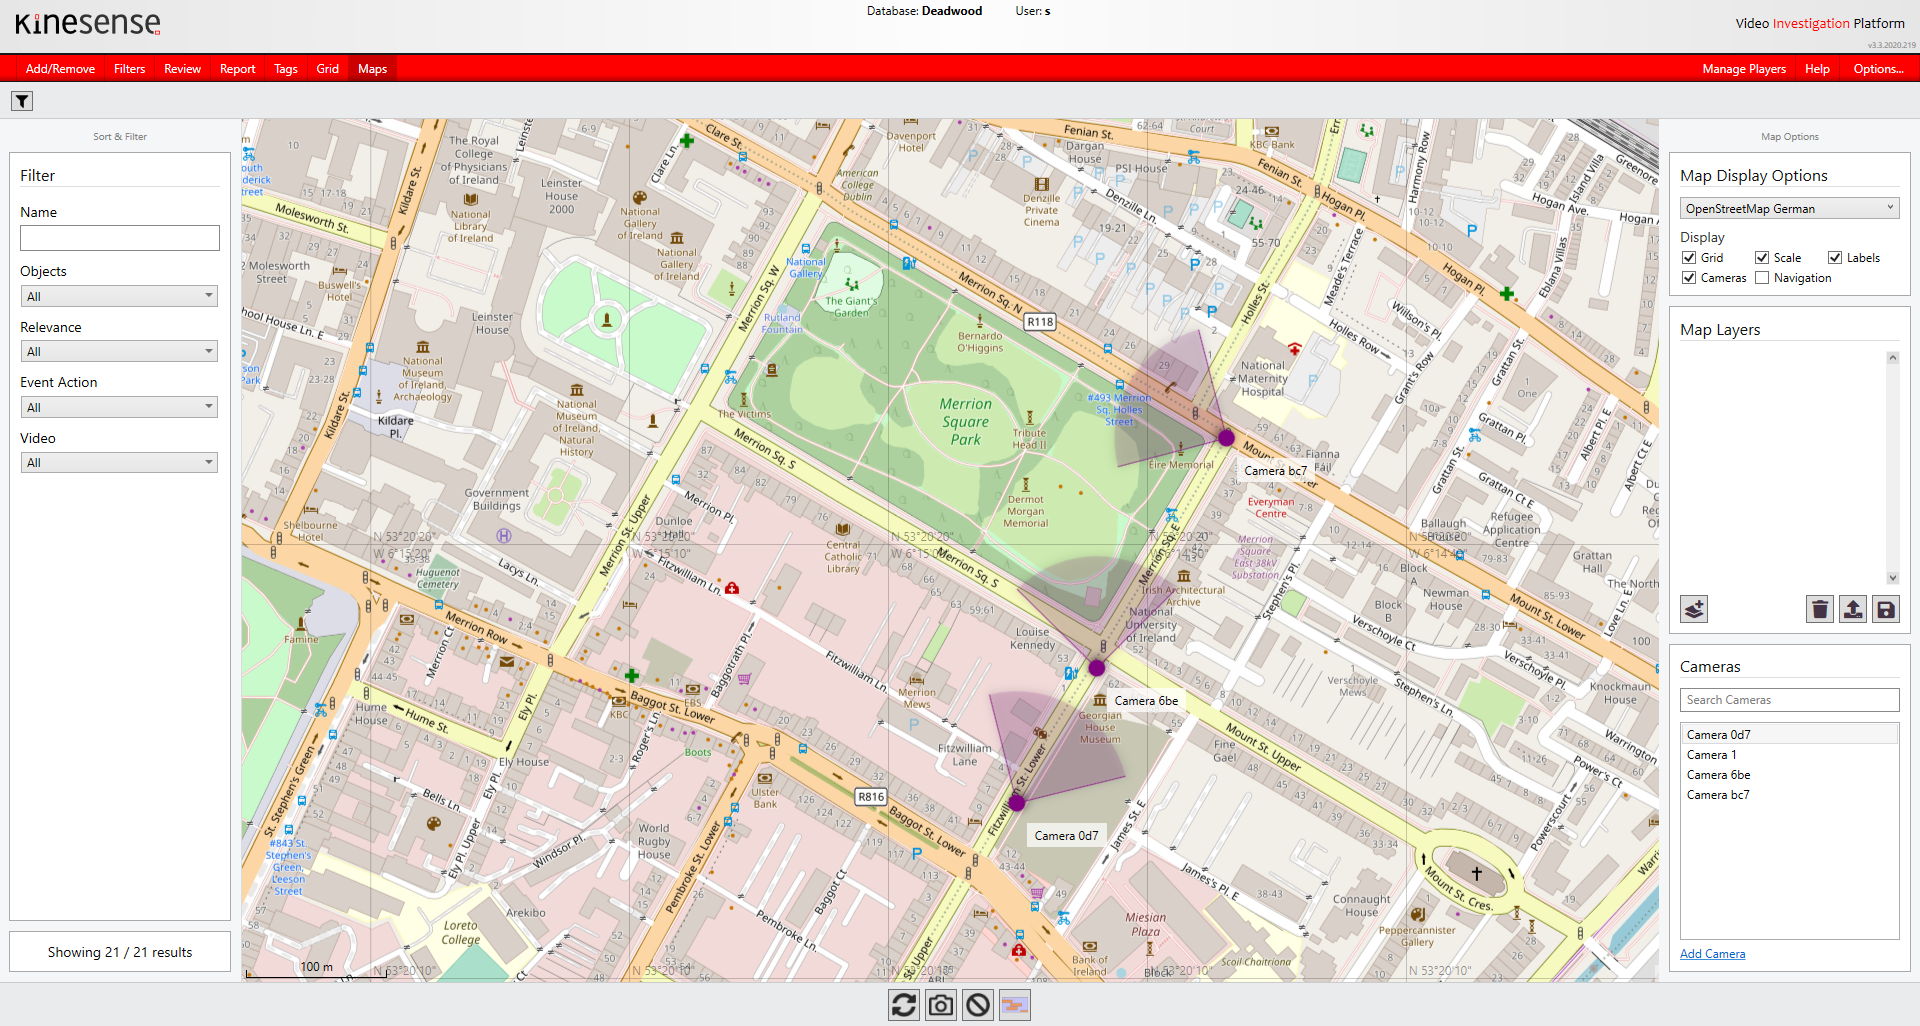
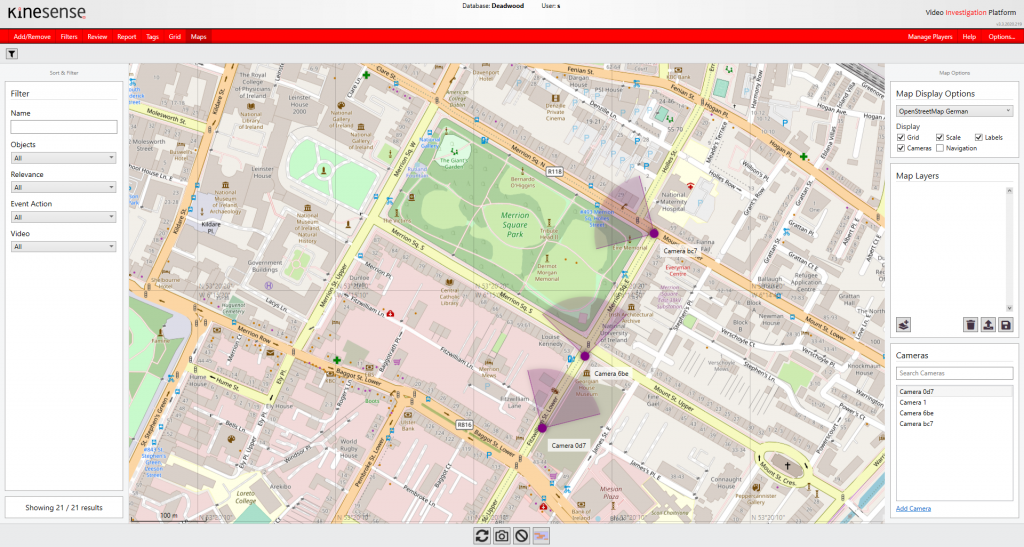
When you first open up the maps tab the default maps view will appear along with a list of different map sources on the top right. Out of the box, Kinesense doesn’t come with any maps and it will rely on a connection to the internet to download your maps. If you don’t have access to the internet, you can download a ‘maps pack’ on a different machine and copy it to a shared folder on your network or directly to your Kinesense machine.
There are several different sources of maps you can choose from, including a few different language versions of Open Street Map and some Bing options. When you select a different option from the drop down the new source will automatically load in your screen.
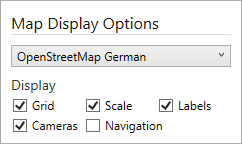
There are options to turn off different elements of the display, the grid line and scale, and to hide the cameras or labels. ![]() Turning on navigation adds buttons to the side of the map that allows you to zoom in and out of the map. Otherwise this function can be preformed by the scroll wheel on your mouse.
Turning on navigation adds buttons to the side of the map that allows you to zoom in and out of the map. Otherwise this function can be preformed by the scroll wheel on your mouse.
Cameras
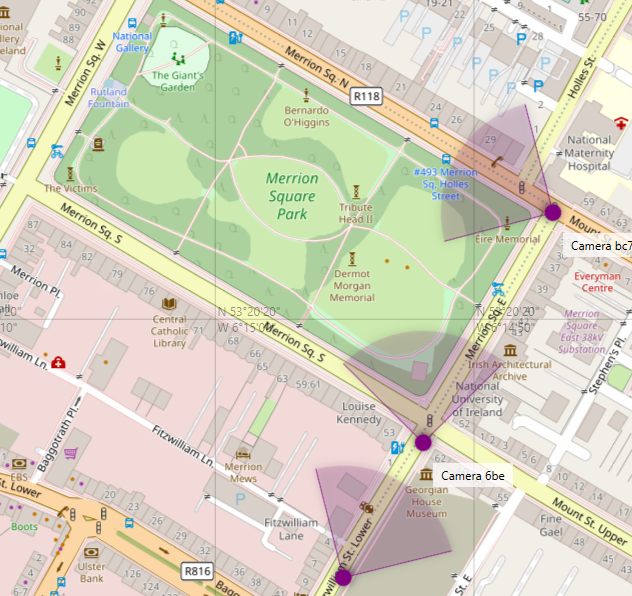 In our previous post we talked about adding cameras while we were importing a video. Now we’ll talk about how they are displayed in maps. When you open up the maps tab all the cameras you’ve added, either through import wizard or previously in the maps tab, will appear. If a camera doesn’t show up after adding it through the wizard click the Refresh button
 ![]() at the bottom of the screen.
at the bottom of the screen.
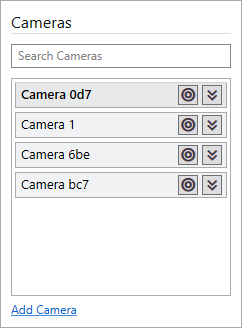 On the bottom right on the maps tab there is a list of all the cameras you’ve added to the database. You can use the bar at the top to search for a particular camera. You can click on the Go to button
 ![]() next to the camera to bring to directly to it on the map. Under the list there is the ability to add a new camera by clicking Add Camera. This follows the same process as discussed in our previous blog post.
next to the camera to bring to directly to it on the map. Under the list there is the ability to add a new camera by clicking Add Camera. This follows the same process as discussed in our previous blog post.
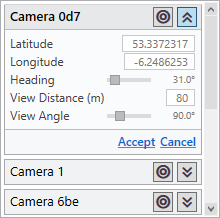 Expanding the camera allows you to see more details. Clicking edit allows you to edit the details of the camera, including changing the viewing distance of the camera and the viewing angle.
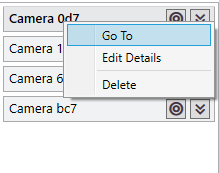
Right clicking on a camera on the list gives you the option to delete the camera, go to it’s location on the list or edit the camera details (i.e. change the name of the camera and add notes).
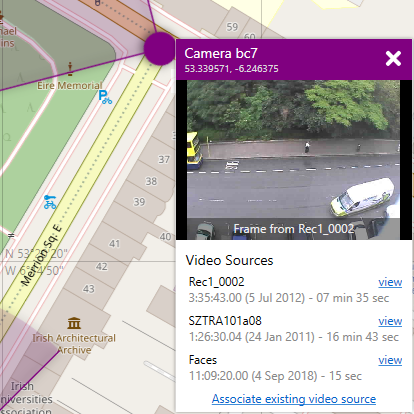
If you select a camera on the map, a pop out will show you all the video sources associated with that camera and a preview of the first camera in the list. By selecting ‘view’ beside each of the video sources you can just to that video source in the Review tab. If you have two monitors you can pop out the maps tab, by double clicking on the tab itself, and have to displayed beside your review tab you so can use the map to see what cameras should be viewed next.
If you have already imported a video and want to attach it to the camera you can do this be selecting Associate existing video source at the bottom of the list.

Select one of the videos from the video source list provided.
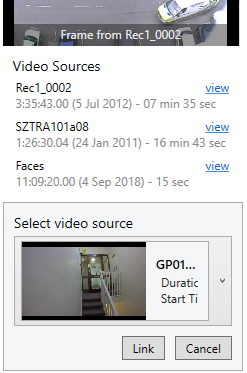 When you’ve selected your video click Link and the video source will now be associated with that camera.
Settings
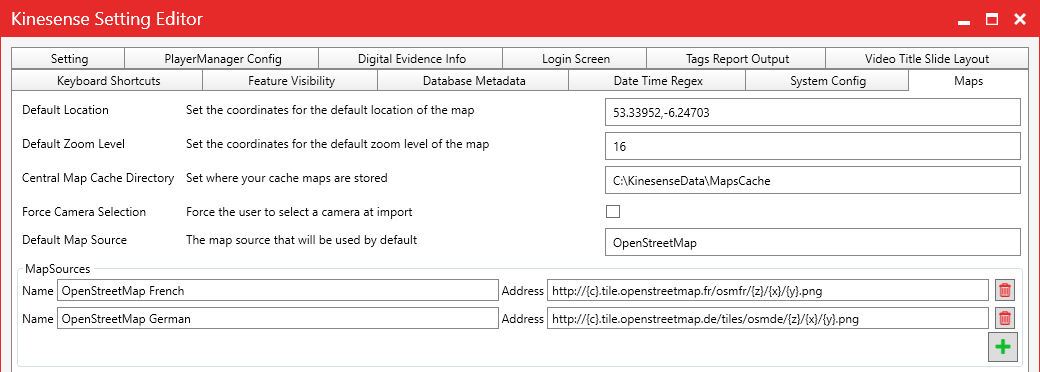
A new settings page has been added for maps. Here you can change the default location, zoom level, location of the offline maps and if the user should be forced to select a camera in the import wizard. This also contains the map sources that can be viewed in the maps tab. If you change the Default Map Source make sure the name you put in that field is the same as the Name field in MapSources.
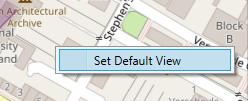 You can also change the default view directly in Kinesense. In the maps tab, go to the area you want as you default view. Then right click anyone on the map, as long as it’s not directly over a camera or tag. Select Set Default View and the next time you open up Kinesense that is the view that you will see.

 [/one_third][two_third last=”yes” spacing=”yes” center_content=”no” hide_on_mobile=”no” background_color=”” background_image=”” background_repeat=”no-repeat” background_position=”left top” border_position=”all” border_size=”0px” border_color=”” border_style=”” padding=”” margin_top=”” margin_bottom=”” animation_type=”” animation_direction=”” animation_speed=”0.1″ class=”” id=””]