

As we prepare to launch 3.3 into the atmosphere, we’re going to go though all the new features in detail. A while back we went showed you a preview of the new features, today we’re going to focus on maps and how you add cameras and connect them to your video sources.
 The new maps tab allows users to view a map in Kinesense, add cameras, link those cameras to video sources and view tags. In the coming weeks we’ll go into detail about this tab and all the glorious things it can do. For today we’ll focus in on the import process and how to get started in creating and linking up you cameras.
Import Wizard
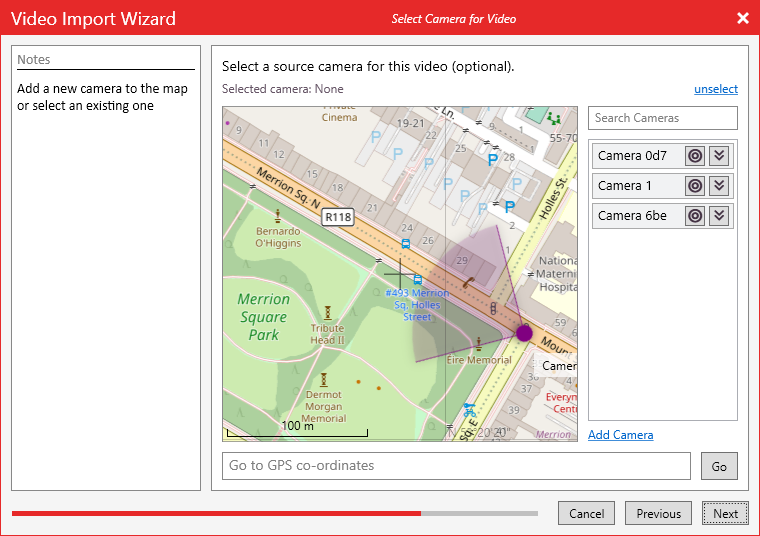 In the import wizard there is now a camera selection page. In here you can attach the video source you’re about to import to an existing camera or create a brand new camera.
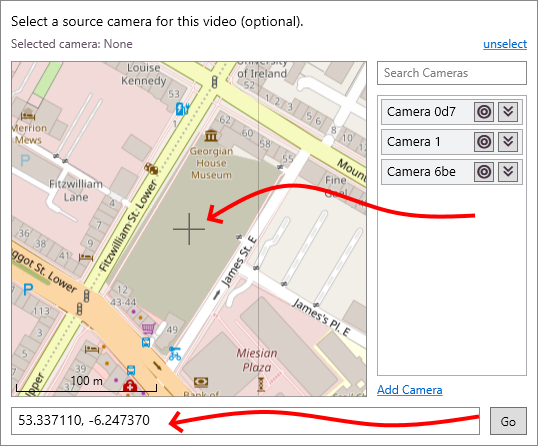
To create a new camera you first have to navigate to the location you want to add the camera too. You can do this in two ways, either using the mouse to scroll in and out and pan around. The other is to input GPS co-ordinates into the text box under the map and press Go. The cross hairs in the middle of the map represents where the new camera will go. You can move the camera after it’s been place so it doesn’t need to be exact when you put it down at first.
 Clicking on Add Camera below the camera list will add a camera in the centre of the map, starting it in edit mode. By double clicking on the map you can also add a camera.
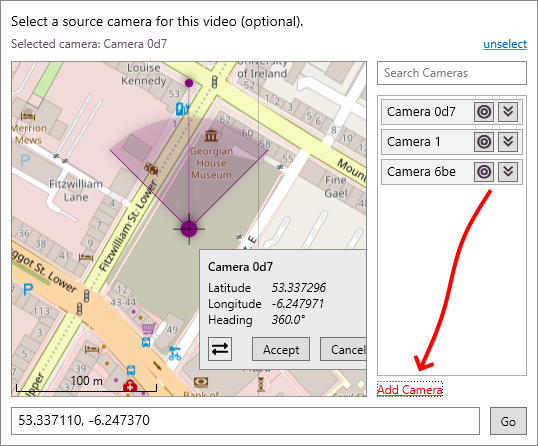
 You can drag the camera around the map at it’s base point. The ‘viewing cone’ (representing the region visible in that camera view) can be adjusted by dragging the top dot. Once you’re happy with the position of the camera you can click accept. If you need to move the camera after this you can right click on the cameras base point and edit it.
If you want to navigate to a camera’s position you can click the Go to button ![]() beside the camera name.
beside the camera name.
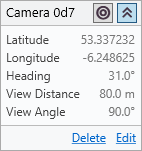
Expanding the camera in the list gives you more details about the camera. Clicking edit allows you to change the all of the different values and puts the camera on the map back into edit mode so you can move it around the map. You can manually type in the distance the camera can see by changing the View Distance. The View Angle allows you to change how much wide of an angle the camera covers. If you have a 360 camera you can change the angle to better represent that here.
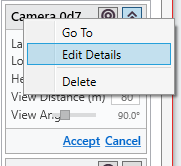
Right clicking on a camera in the list gives you a few options. By selecting Go To the camera the map will navigate to the camera you’ve selected. Edit Details allows you to change the name of the camera and add some notes. Delete removes the camera from Kinesense.
Once you’ve either selected an existing camera from the list or created a brand you one, you can continue on as normal through the wizard and import your video. This video will then be linked to the camera you’ve just created and we’ll talk more about exactly what that means in later blogs.
Attaching Cameras
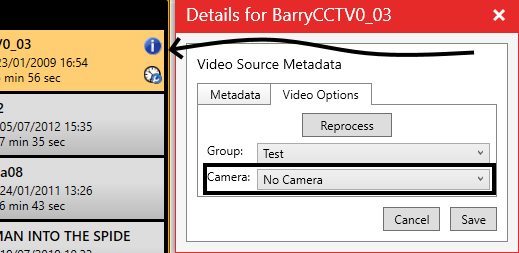 If you’ve imported a video without attaching a camera or attached a video to the wrong camera you can change that in the video details window. In the Add/Remove tab click on the video you want and select the i button. In the details window select the Video Options tab and in the drop down next to Camera select the camera you want associated with that video.
Next time we’ll be going into more detail about the Maps tab and adding layers to your maps.

 [/one_third][two_third last=”yes” spacing=”yes” center_content=”no” hide_on_mobile=”no” background_color=”” background_image=”” background_repeat=”no-repeat” background_position=”left top” border_position=”all” border_size=”0px” border_color=”” border_style=”” padding=”” margin_top=”” margin_bottom=”” animation_type=”” animation_direction=”” animation_speed=”0.1″ class=”” id=””]