

Today is finally the day, GDPR is upon us. I’m sure you’re all very well prepared for it at this stage but just in case here is how Kinesense can help with some of your GDPR needs. One of the new measures put in place allows anyone featured in a video to request of copy of it. You are required to redact the faces of anyone else in this video before handing it over. You can achieve this by using annotations in Kinesense. Using an example interview video from youtube:

Annotations
In the annotations tab users can take an image or a video clip that they’ve created and annotate it. There are four annotation options, zoom, spotlight, arrow and audio. We’ve already covered gaps and hiding and locking annotations previously. As this is GDPR themed we are going to focus today on blurring out faces and to do this we will be using spotlight.
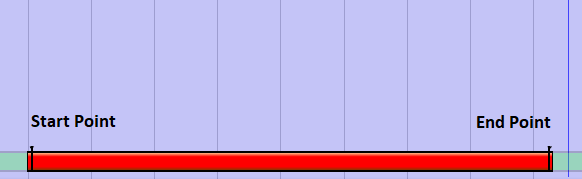
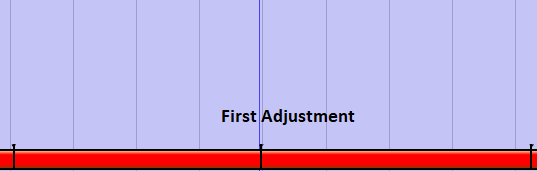
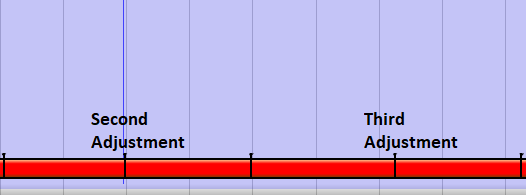
Select, on the timeline, the moment when the person you want to blur first appears. Click Add Spotlight![]() and the spotlight circle will appear. Drag it over the person you want to blur and then move along the timeline. When you move the spotlight again Kinesense will try to connect those two points in a straight line. If the subject is moving, try to find the next point where he stops or changes direction and then move the spotlight. Then go back over the area covered and adjust. I like to split the annotated section in two each time as it cuts down on the amount of adjustments you need.
and the spotlight circle will appear. Drag it over the person you want to blur and then move along the timeline. When you move the spotlight again Kinesense will try to connect those two points in a straight line. If the subject is moving, try to find the next point where he stops or changes direction and then move the spotlight. Then go back over the area covered and adjust. I like to split the annotated section in two each time as it cuts down on the amount of adjustments you need.
 So far what we’ve done is put a circle around a subject. So to actually blur them out we can use some of the blurring options in the Effect section of the toolbar.
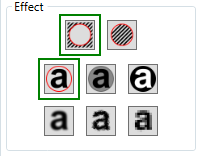 On the top row you can select which area you want effect by the blurring options. Exterior
 ![]() means everything outside the spotlight will be effect where as Interior
means everything outside the spotlight will be effect where as Interior ![]() means that the area inside the spotlight will be effected. The first blur option
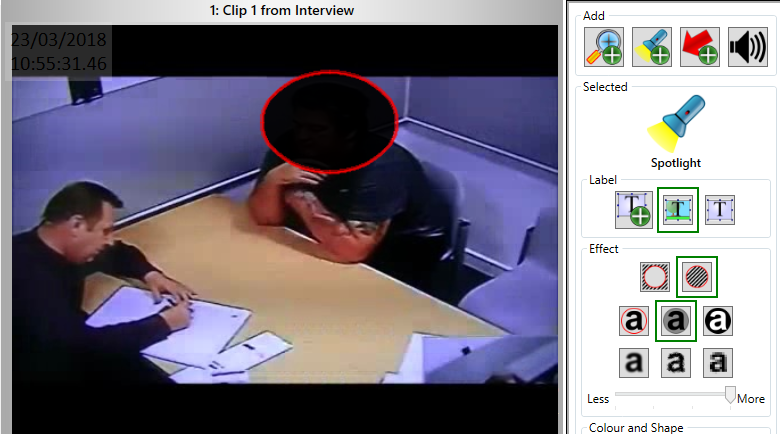
means that the area inside the spotlight will be effected. The first blur option ![]() will give you the circle and nothing more. The next two are about darken the image rather than blurring it. As you can see in the image below darken
will give you the circle and nothing more. The next two are about darken the image rather than blurring it. As you can see in the image below darken![]() has been selected and a slider has appear underneath so you can adjust how dark you want the image. For complete black out use
has been selected and a slider has appear underneath so you can adjust how dark you want the image. For complete black out use ![]()
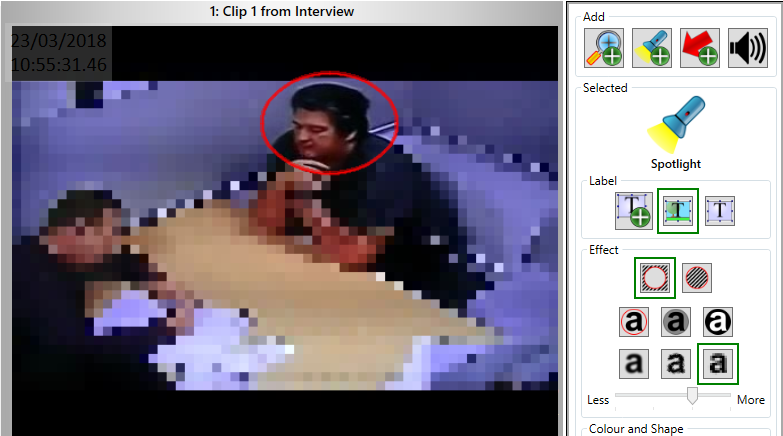
The bottom three buttons and your blurring options. They are just 3 different types of pixelation that can be applied, all with the ability to adjust how pixelated you want them to be.

Or if you wanted to blur out everything and keep whats in the circle – just one more click.
Blur out whats in the circle
Hopefully this makes life in our new GDPR world a little bit easier for you!

 [/one_third][two_third last=”yes” spacing=”yes” center_content=”no” hide_on_mobile=”no” background_color=”” background_image=”” background_repeat=”no-repeat” background_position=”left top” border_position=”all” border_size=”0px” border_color=”” border_style=”” padding=”” margin_top=”” margin_bottom=”” animation_type=”” animation_direction=”” animation_speed=”0.1″ class=”” id=””]